Labels

Showing posts with label diet. Show all posts

7.07.2017

ANMITSU

If you like smoothie bowl or Chia pudding,  but never have tried Japanese summer dessert Anmitsu, You would like to try this one. It is made of some fruits, AZUKI, SHIRATAMA and KANTEN agar jelly which is  nearly 0kcal and contains 80% fiber! ANMITSU is also good for vegetarian or vegan!!!


If you don't put ice cream, it's just ANMITSU. But If you add ice cream on, We call it Cream ANMITSU.
*Ingredients* 4 servings
4g (=2tsp) KANTEN (agar agar)powder
500ml water
1 tbsp sugar
1/2 tsp matcha powder and 1/2 tsp hot water
4 tbsp SHIRATAMAKO
3 tbsp water
4 tbsp canned AZUKI (red bean paste)
4 scoops ice cream (matcha or vanilla)
Canned mandarin orange
Canned cherry
KUROMITSU (Black sugar syrup)
SHIRATAMAKO


*Directions*
1. Place KANTEN powder and water in a saucepan. Whisk and Cook over medium heat, Whisk constantly, Bring to a boil. Add sugar, cook on low heat and whisk about 1 minute. Remove from heat.Pour the half of mixture into square baking dish or jelly mold. Stir together matcha powder and hot water in a small cup until it dissolved. Add MATCHA mixture into remaining KANTEN mixture and whisk together. Pour it into square baking dish/jelly mold. Let cool and Chill in Refrigerate.

2. Make Shiratama next. In a bowl, put in SHIRATAMAKO, and add water gradually until the dough turns as soft as your earlobe.Make 8 small ball with your hands.Press the center of the ball gently with your finger. (Helps to make the center of dumpling cook evenly and easier.) Put dumplings in the boiling water and boil them till they float. Remove the dumpling and cool them in cold water with ice. When it's cooled, drain the dumplings.

3. Cut the KANTEN jelly into small cubes. Arrange in bowls with Shiratama, fruits, AZUKI, and Ice cream. Drizzle with the KUROMITSU if you have.


5.22.2017

小満レシピ Green pea falafel

二十四節気「小満」に合わせ、グリーンピースのファラフェルと玉子豆腐のグリーンピースソース添えを作りました。
英語のレシピをSIZZLE BLOGにて載せて頂いています。
写真もさすがプロ!素敵な写真を撮ってくださいました〜。

Green pea falafel / Green pea Tamago tofu recipe.
https://hue-hue.com/media/syouman-2017/

9.02.2016

簡単!Smoothie Bowl!

少し前からinstagramで見かけて気になっていたSmothie Bowlを作ってみました!


まだ残暑厳しいから、こういうひんやりしたフルーツたっぷりのボウルは美味しい。一時期流行ったヨナナスで作ったみたいな感じにクリーミーに仕上がります。
うちの生後7ヶ月の坊やもふむふむと食べてくれました。
バナナ好きだし、赤ちゃんて案外便秘になったりもするから、ヨーグルトやきな粉が便秘に効くんじゃないかなと期待!

作り方はとっても簡単で、材料を全部ミキサーかブレンダーにかけるだけ。
注意点は、中に入れるバナナは、熟れたものを使うこと。熟れたやつを使えば、余計な砂糖を足す必要がないです。それから、凍らせる前にスライスしておくこと。大きいままだとミキサーにかけずらいので。
あんまりパワーのないミキサーやブレンダーをお使いの場合は、バナナは凍らせずそのままお使い下さい。飲むスムージーみたいに液状になるけれど、味は同じです。

それは材料を。

*材料* 1~2人前
(スムージーボウル)
熟れたバナナ 1本
きな粉 小さじ1
冷凍のベリー 大さじ1
オレンジ 1/2玉
ヨーグルト 大さじ2

(飾り用)
バナナ 1/3本
冷凍のベリー大さじ1
グラノーラ大さじ1

*作り方*
1. スムージーボウルの材料を全てミキサーかブレンダーにかける。
2. 飾り用のフルーツやグラノーラを飾り付けて出来上がり。

凍ってたバナナが溶けてくると液状化してくるので、早めにお召し上がり下さい。
フルーツは何を使っても美味しいと思います。梨やスイカも試しましたが美味しかったです!
あとはナッツやココナッツやドライフルーツを飾りに使うのもおすすめです。

4.15.2013

バターミルクランチドレッシングで簡単サラダ

Follow my blog with Bloglovin


キューピーさんからバターミルクランチドレッシングという新しいドレッシングが発売されました。
ランチドレッシングって、私は大好き!
アメリカではどこのスーパーでもあったんだけど、日本ではほとんど見かけることがなく、あったとしても輸入食品店くらいにしか置いてなかったので残念に思ってたのさー。
けど、これからはいつでもスーパーで買えるのねー。嬉しい!
ランチドレッシングって、ちょっとこってりクリーミーなドレッシングで、アメリカの子供はウインナサイズのちっこい人参にこれをつけて食べてた。ぽりぽりぽりぽり。
日本のちびっこは人参が苦手な子も多いと思うんだけど、アメリカの子供はホントによくちっこい人参を食べてたなー。野菜はそれしか食べないという子もいたなぁ。国によって好き嫌いも変わってくるもんだね。


私は、前からやってみたかった、レタスをドーンっと切っただけのサラダに今回挑戦してみましたわよ!

ランチドレッシングをたらら〜っと垂らす。

今、うちの近所の産直では少し小さめのレタスが6玉くらい入って120円くらい。やすーい!スーパー行くと1玉それくらいするもんね。なので、そのいっぱい入ってるやつを買ってきて、わしゃわしゃ食べています。おいし!

では、すごーく簡単なレシピ。
 *材料* 1人前
小さめのレタス  1/4玉  (普通サイズのレタスの場合は1/6玉。大きめなら1/8玉。)
ベーコン 1枚
(メープルシロップ 小さじ1/4程度)
ゆで卵 1個
キューピー バターミルクランチドレッシング 適量
ぐしゃぐしゃになっちった…。けど、美味しいよ!
 *作り方*
1. ベーコンを半分に切って、弱火に熱したフライパンで炒めます。ベーコンに火が通ったかなってくらいのとこでメイプルシロップをスプーンの背などで塗り、カリっとするまで炒めます。(焦げやすいので注意。)メイプルシロップは風味づけの為なので、なくても全然オッケーです。

2. レタスを洗ってしっかり水を切り、1/4に切る。ゆで卵を半分に切る。

3. レタス、ベーコン、ゆで卵を盛りつけてドレッシングをかける。All set!

このドレッシング、こってりしてるので、レタスのさっぱりにとてもよく合う!ベーコンとゆで卵にも合う!
結構満足感のあるサラダに仕上がっております。お試しあれ。


10.16.2012

Peanut Butter & Chocolate Muffin

Thank you for visiting my blog!
I've been working so busy for my small american style bake shop.
I'm so happy to know that Japanese people actually loves American style foods more than I expected.

As you know, American people really really love Peanut Butter.
I wasn't a big fan of the Peanut Butter. But, after I spent a few years in the US, I became a PB person.
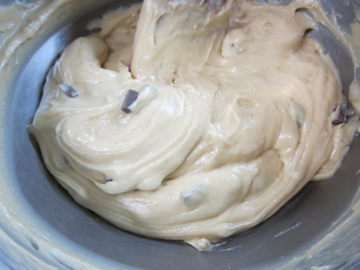
I think this Peanut Butter & Chocolate Muffin is my best ever Muffin. I think.

*Ingredients* 10 Muffins
1 Egg
140g granulated sugar
50g unsalted butter
80g Peanut Butter
35g Chocolate Chip

A: Dry Ingredients
175g all purpose flour
1/2 tsp Baking Soda
1/2 tsp Baking Powder

B: Liquid Ingredients
120 ml milk
1 tbsp white vinegar 

*Directions*
Preparation
Shifted all A dry ingredients.
Preheat oven to (175C)350F.
Put muffin cup on muffin Pan.
Butter and egg and PB and milk must be in room temperature.
mix 
 B together. set aside.
1.  In a bowl, Beat the butter and sugar with a electric mixer until fluffy. add peanut butter and mix.

2. Add beaten egg a half at a time and mix well.
3. Fold a half of A into butter mixture with a spatura. add a half of B into mixture. add A, add B. then, add Chocolate chip.(Take small amount of chocolate chop for topping, if you like.)

4. 
pour the batter into the pan, Lift and drop the pan on the counter to pop the air bubbles.( sprinkle the rest of chocolate chip. )Bake for 18 minutes. or until a toothpick inserted into the center comes out clean.
They are very fluffy, soft, smells so nice, and yaaay! Yummy!
I tasted a small one. oh, no! I wanted to eat all of them!

I know I should sell them for my bake shop, but It's difficult to reject temptation. because smells so peanuts butter! ahh! 
so, I ate some a few of them.
smells so nice!

If you plan to bring them for potluck or party, you be careful with peanut butter temptation!


8.17.2012

HIYAYAKKO (Chilled Tofu)

There's nothing better than HIYAYAKKO during the summer in Japan.
It's been really humid and hot!!! So, I don't want to cook anything.
But Here is a HIYAYAKO.  It's Japanese traditional summer dish.


No bake. just a Tofu served with some toppings.

Oh, and Do't forget, Tofu have a lot of protein in it!!!

* Ingredients* 2 servinngs
1 block of Chilled Silken Tofu (or Firm Tofu)

(Toppings of your choice)
Myoga Ginger
Chopped Green Onion
WASABI
SHISO Leaf
grated Ginger
KATSUOBUSHI (bonito flakes)
Soy Sauce

*Directions*
1. Remove the tofu from the package and the liquid.
2. Cut a block into halves.
3. Place each Tofu in a small bowl.

4. Put on the toppings of your choice as desired.
for topping!

and Drizzle the soy sauce over the Tofu.

Eat immediately!


Enjoy the rest of summer with your HIYAYAKKO.


12.30.2011

Orange Marmalade gateau au chocolat no butter, no flour in it! オレンジマーマレードガトーショコラ


I made it!!!
I tried make a no butter, no flour chocolate cake last time,  I changed some directions this time. and Look! it's amazingly dense!
Only I used 3 ingredients. Chocolate bar, Egg, Orange marmalade. no flour, no butter, no sugar added.


Butterless,  Flourless / Orange Marmalade Gateau au Chocolat
*Ingredients* 7 inch pan
3 egg
3 tbsp orange marmalade
174g (about 6 oz) Dark sweet chocolate bar

*Directions*
Preparation:
Preheat oven to 175C(350F).
Place parchment paper or grease on a round 7 inch pan. 
All ingredients must be at room temperature.
separate egg white from yolk.
1. Beat egg white with electric  mixer till dense foam. 


2. Melt chocolate. Beat yolk with electric  mixer till thick and light colored in a double boiler. but not so hot. need warm up.


3. Fold chocolate into yolk third at a time with a whisk.
4. Fold 1/3 of meringue into chocolate mixture with a whisk. Combine orange marmalade. Fold chocolate mixture into rest of meringue with a whisk.
Whisk is fine. 
5. Pour the batter into a pan, Lift and drop the pan on the counter to pop the air bubbles(no splashing!). 


wanna lick it!
6. Bake for about 15 to 20 minutes at 175C(350F) or until a toothpick inserted into the center comes out clean. 


Tips: Before you begin to cut cake, Warm up the knife. and I think next day is the best time to eat.
Yummmmmy!


バターも薄力粉も入っていないガトーショコラ、今回はオレンジマーマレードで試してみました。甘みと酸味が加わってコレはかなりの出来よ!

メレンゲをへらでさっくり混ぜるより、泡立て器でぐるんぐるんと大きく混ぜだ方が、メレンゲの泡も潰れなくてキレイにさっと混ざる気がする。
薄力粉入ってないということは、グルテンも出ないし、へらより泡立て器の方がいいのかも。
結構ぷっくり膨らんだよ。冷えるとしぼんでしまうんだけど、くちゃっとした感じも良い。

材料は覚えやすいように3で揃えてみましたよ♪
オレンジマーマレードのガトーショコラ 
*材料*
卵 3個
ダークチョコの板チョコ 3枚(174g)
オレンジマーマレード 大さじ3
生クリームちょっとゆるかったかしらん?

*作り方*
型に型紙をひくか、バターか油を塗っておく。
オーブンを175度に予熱。
材料は全て常温にしておく。
卵白と卵黄に分けておく。

1. 卵白をしっかり泡立てメレンゲを作る。
2. チョコレートを溶かす。卵黄を湯煎にかけながら少しもったりしてくるまで、電動ミキサーで混ぜる。泡立て器にもちかえて、溶かしたチョコレートを卵黄に1/3量ずつ加え混ぜる。
3. 1/3量のメレンゲをチョコレート液に加え、泡立て器でぐるんと大きく混ぜる。マーマレードを加える。この混ぜ合わせた生地を残りのメレンゲに入れて泡立て器でぐるんと混ぜる。
4. 生地を型に流し、型を高いところから落とし、空気を抜く。予熱しておいたオーブンで15~20分焼く。竹串などを刺して、焼き具合をチェックして下さい。

切り分ける時は、ナイフをあっためてから切るとキレイに切れます☆
オレンジのいい香りがしてとても美味しい!
苦めがお好きな方は黒いチョコで大人味。ミルクチョコの板チョコだと食べやすい味になります。私は今回、ガーナのダークチョコ2枚、ガーナのミルクチョコ1枚で作りました。
ホイップクリームなどを添えて召し上がれ〜。

最近作ったケーキの中で一番うまくできた気がする!

ランキングに参加中です♪下のボタンにクリックを頂けるととても嬉しいです〜。

12.14.2011

Broccoli Christmas tree and wreath ブロッコリーのクリスマスツリーとリース

When I see broccoli at grocery store, I feel it look like small forest. Don't you think?
I used broccoli as like a christmas tree.
Christmas tree!
Christmas wreath
Haha! I would say its cooking than crafting with food. and yes, it's pretty easy and quick!
Christmas tree and wreath
*Ingredients*
a bunch Broccoli
3 cherry tomato
2 tbsp frozen mix vegetable
mayonnaise to taste
sliced cheese, ham and parmesan cheese (optional)

*Directions*
1. Boil broccoli and drain well. Douse mix vegetable lightly in hot water.

2. when it cold, Pile 1/3 of broccoli up , make a circle with 2/3 of broccoli. and decorate it with mix vegetable and cherry tomato.
tree
wreath
tree decoration

3. Drizzle mayonnaise over!


産直やスーパーでブロッコリーが並んでるのを見ると「ていうか森?」と思ってしまいます。
わっさわっさ生い茂っている森みたいに見える。
森っぽさを利用して、ブロッコリーでクリスマスツリーとリースを作ってみました。

もう、料理っていうか、工作っぽくなっております。
すんごく簡単で、作るのも楽しい♪

ブロッコリーのツリーとリース
*材料*
ブロッコリー 一房
プチトマト3個
ミックスベジタブル(冷凍) 大さじ2
マヨネーズ 適量
ハム、スライスチーズ、粉チーズ お好みの量

*作り方*
1. ブロッコリーを茹でてザルにあげる。ミックスベジタブルもさっと湯通しする。
2. ブロッコリーが冷めたら、1/3量でツリー、2/3量でリースを作る。トマトやミックスベジタブルやスライスチーズを飾り付け、マヨネーズをかけて出来上がり!

粉チーズをかけると雪が積もったみたいに見えますよー。

ランキングに参加中です!下のボタンにクリック頂けると嬉しいです〜♪

11.06.2011

Buckwheat Crepes and AZUKI Whipped Cream そば粉のクレープとあずきのホイップ

I like SOBA noodle.
Some Noodles make me feel guilty, somehow. but not that much guilty with SOBA noodle.
Why? because its from buckwheat.
I made Buckwheat Crepe filled with AZUKI (sweet red beans paste) Whipped cream!


  *Ingredients*  1 Cup = 250ml
Buckwheat Crepe 12 servings
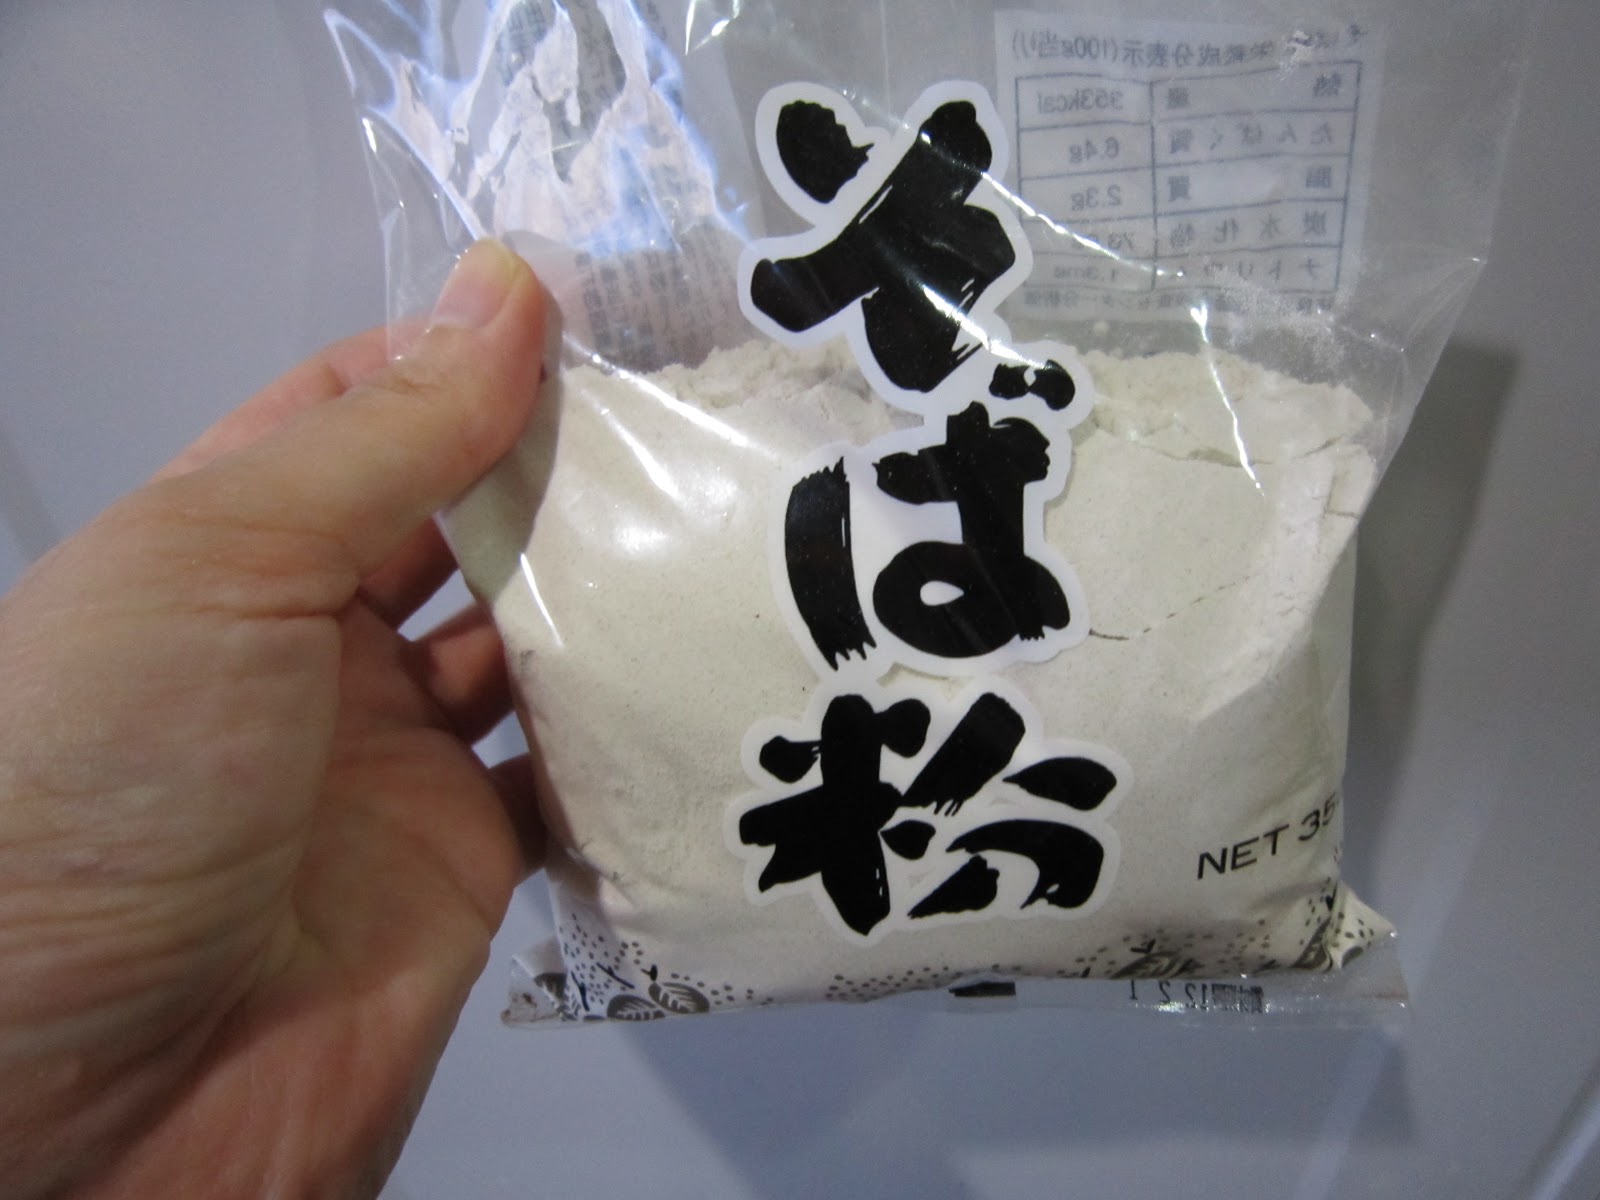
65g (1/2 cup) Buckwheat flour
Buckwheat flour=SOBAKO

250 ml (1 cup) Milk
2 tsp Olive oil or Vegetable oil
a pinch of salt
1 tsp sugar
1 Egg

AZUKI Whipped Cream
100 ml (1/3 cup and 2 tsp) Heavy cream
1 can (200g) of sweetened AZUKI  red bean paste (TSUBUAN)
It's cooked, sweetened. you might be able to find it in Asian super.

   *Directions*
1. In a bowl, Whisk all crepe ingredients together. mix well until smooth. Keep it in refrigerator at least for 1 hour.

2. Heat lightly greased  non- stick skillet over medium heat.  . pour the batter onto skillet and spread thinly. Flip it when it cooked. make 12 crepes. let them cool.
light brown!
3.  In a chilled bowl, Whip cream until soft peaks foam. add AZUKI beans and Mix well.

4. Place about 3 tbsp of Whipped cream on a crepe. then Roll up!


Yum!
and, you can make a galette with this crepe!
Elegant!
Make a crepe in a skillet over low to medium heat, then place egg, ham. and cheese on a crepe. put a little bit salt and pepper.  Cover with a lid until it cooked. and fold up the edges!


and, If you have a pancake mix in your pantry, You should to try cook this AZUKI  whipped cream with Pancake!
Pancake AZUKI Whipped cream Sandwich!
In Japan, We call this as a 'DORAYAKI'.
DORAYAKI is supposed to filled  sweetened AZUKI beans paste between two of pancakes. That's the most basic one.
and There are Azuki whipped cream one in these days. I like both. so yum!

そば粉のクレープを作りました。
ホイップクリームに市販の缶詰のつぶあんを混ぜてくるっと巻くだけで、簡単に和風デザートができます。


  *材料*
そば粉のクレープ 12枚
そば粉 65g
牛乳 250 ml
塩 ひとつまみ
サラダ油、またはオリーブ油 小さじ2
砂糖 小さじ1


小豆ホイップ
タカナシのクリームホイップ40   100 ml
缶詰の粒あん 一缶(200g程度)


*作り方*
1. クレープの材料をボウルに入れて泡立て器で混ぜる。(そば粉はとてもサラサラなのでふるう必要なしです!ラクチン!)冷蔵庫で1時間以上生地を休ませる。

2.薄くバターかオイルを塗ったフライパンを中火にかけ、クレープを焼いていきます。焼けたら冷ましておく。

3. 別のボウルに生クリームを泡立てます。この時、ボウルの底に氷水をあてると泡立ちやすい。ホイップ状になったら、粒あんを加えてさっくり混ぜます。

4.約大さじ3くらいのホイップクリームをクレープ生地の上に置き、くるっと巻いてできあがり!!

このそば粉のクレープを使って、ガレットも作れます。
クレープを軽めに焼いて、弱火から中火にし、クレープ生地の上にハム、とろけるチーズ、卵を割り入れ、塩こしょうしたら蓋をして卵に火が入るまで待ちます。四隅を折ったらできあがり!

それから、この小豆ホイップで生どらも作れます!
ホットケーキミックスで小さめのホットケーキを焼いて、冷えたらホイップを挟んでできあがり!これも美味しいので是非オススメですよー♪

お!と思ったら、クリック頂けると光栄です。


Labels

Japan (140) Sweets (112) for kids (73) cook in the american style (69) column (51) 日本語 (48) America (41) chocolate (38) vegetable (37) fruits (32) diet (27) easy (27) healthy (25) meat (24) Breakfast (22) Egg (20) dessert (20) tea (20) travel (20) snack (19) item (17) Idea (16) Tofu (16) Bread (14) spring (14) rice (13) spice (12) the basics (12) Event (11) press (9) Sauce (8) Soy Milk (8) bento (6) summer (6) Autumn (5) 郷土料理 (5) Movie (4) book (4) Bake shop (3) Seafood (3) Test (3) kagawa (3) noodle (3) plant (3) introduction (2) peanut butter (2) tokyo days (2) trip (2) 海外バズりレシピ (2) Recipe review (1) a (1) fish (1)